Self-healing tests in Katalon Studio
- An active Katalon Studio Enterprise license.
When the application under test (AUT) changes, object locators might be broken or unable to identify the target element. Hence, creating and using correct, resilient locators are crucial to the success of Web UI test automation.
Katalon Studio supports the self-healing mechanism to tackle the issue of broken locators during execution. This feature can reduce your test maintenance effort substantially, especially when test cases run in batch overnight.
This article guides you through:
- Understanding the self-healing mechanism
- Configuring and executing a test with the self-healing mode
- Viewing self-healing insights and replacing broken locators
We also offer a sample project for you to try out. You can clone or download this sample project from our GitHub repository: Self-healing sample project.
Learn more with our Katalon Academy course: Self-Healing Mechanism in Test Automation.
Self-healing mechanism
With self-healing enabled, when Katalon Studio fails to find an object with its default locator, Katalon tries other pre-configured locators associated with that object.
If Katalon Studio finds an object by any alternative locators, the test continues running. Once the broken object is self-healed, the alternative locator that successfully finds the object will be used for the remaining execution. This helps shorten execution time by preventing self-healing from happening again and again with the same broken object.
When the test execution is over, Katalon Studio suggests replacing the broken locator with the locator that found the object. Unless Katalon Studio can find the target object, depending on the failure handling option that you have designed, the test execution may stop or keep going. To learn more about the failure handling options, see Failure Handling.
- Self-healing suggestions with Smart Locators that are not approved in version 9.3.1 will not be visible when the project is opened in previous versions.
Configure Test Design
To learn how to configure test design, see Configure Test Design.
Configure Self-healing execution
Enable and disable Self-healing mode
The self-healing mode is enabled by default. To disable the self-healing mode, there are two ways:
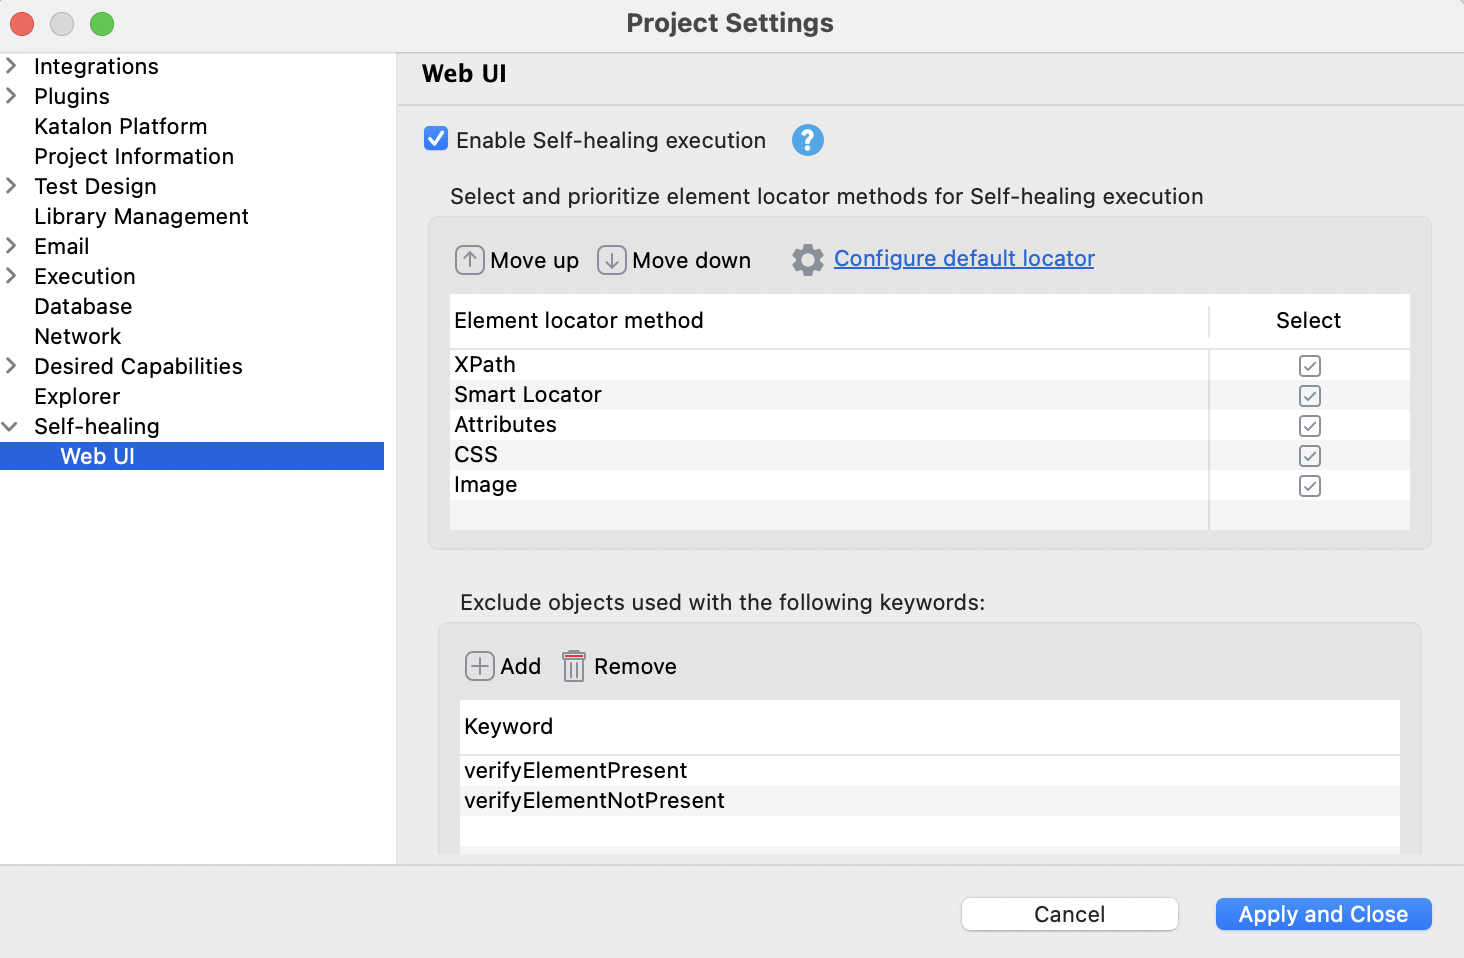
- Go to Project Settings > Self-Healing > WebUI, then uncheck the box Enable Self-healing execution.
From the toolbar, click on the Self-Healing icon, then select Disable Self-healing.

Locator methods
You can decide which alternative locator method is tried first when a locator fails by setting a priority order in global settings.

In the Element locator method table, select one or multiple selection methods used for self-healing tests:
- XPath: If Katalon fails to detect an object with its default XPath value, other XPath options are applied automatically.
- Smart Locator: Self-healing with Smart Locator is applied when Default Smart Locator is enabled. If unselected, you also need to disable Default Smart Locator in WebUI execution settings.
- Attributes
- CSS
- Image: Image-based object recognition allows using an image representing an object to find that object.
Prioritize these methods by moving them up or down.
If you click on Configure default locator, you are redirected to the Test Design section.
Exclude objects used with keywords
In some scenarios, you do not need the test engine to try out different locators to find an object that doesn't exist. Hence, you can turn off the self-healing mode when detecting objects used with specific keywords. For example, the verifyElementPresent and verifyElementNotPresent are excluded by default.
In the Self-healing settings and the Exclude objects used with the following keywords section, click Add and insert keywords you want to exclude from the self-healing mode to the exception list.
When an object is used with the specified keywords in this field, Katalon Studio does not try locating that object with the self-healing mode.
For example:
You add the verifyElementPresent keyword to the exception list. In your test, the default locator of the input_Username_username object is broken.
You run the following test script:
WebUI.openBrowser('https://katalon-demo-cura.herokuapp.com/')
WebUI.click(findTestObject('null'))
def username = findTestObject('Object Repository/Page_CURA Healthcare Service/input_Username_username')
WebUI.setText(username, 'John Doe')
WebUI.verifyElementPresent(username, 5)
Since verifyElementPresent is excluded from self-healing, the input_Username_username object cannot be self-healed, and the test fails as expected.
Override in Object view
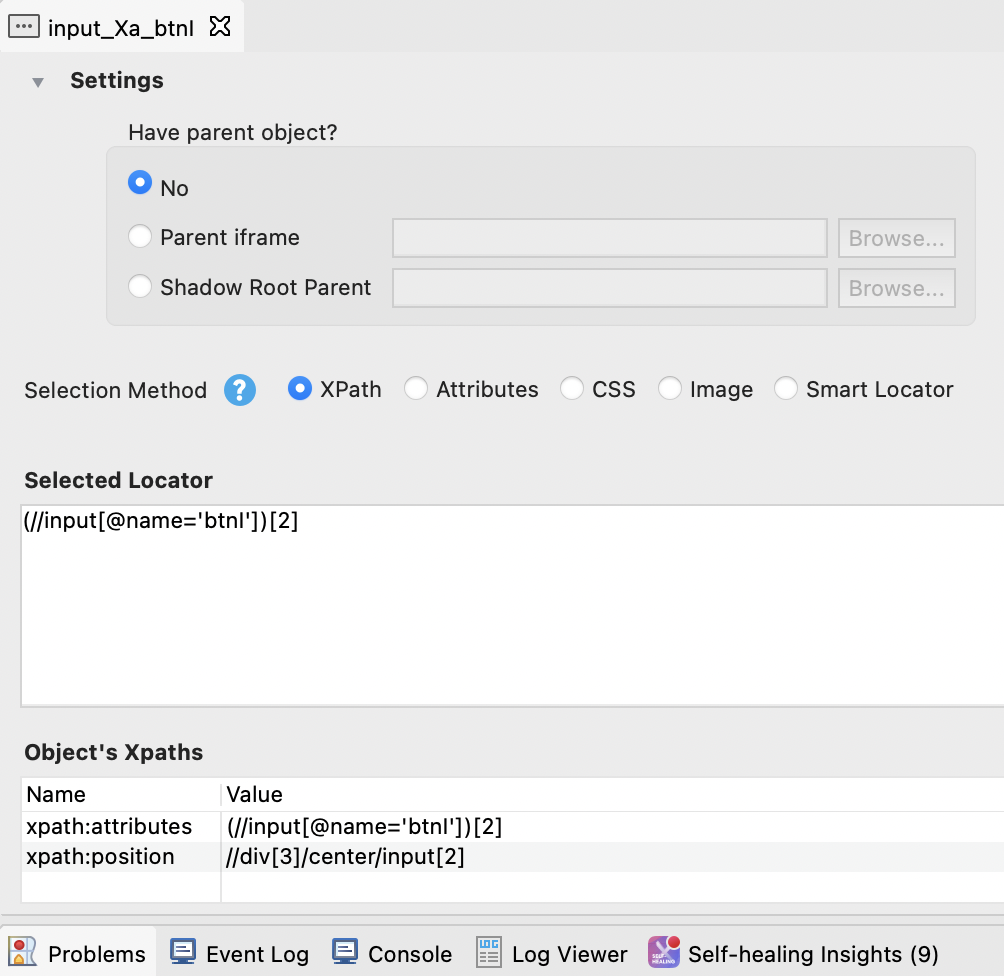
In an object view, you can decide the default selection method for detecting that object during execution. This configuration overrides the Self-Healing global settings.

Self-healing Insights
After you run your test with self-healing, you can see the Self-healing Report in the Log Viewer.

Next to the Log Viewer tab, the Self-healing Insights tab displays a table with all the suggestions to replace broken locators. The table includes:
- Test Object ID: The ID of broken test objects.
- Broken Locator: The default locator that could not detect the object during execution.
- Proposed Locator: The alternative locator that located the object during execution. The proposed locator is the newly generated smart XPath of that element if the object is found by using its screenshot.
- Recovered By: The selection method that Katalon Studio used for detecting the object.
- Screenshot: When finding an object with its alternative locator, Katalon would capture a screenshot of the test object for you to verify whether the found object is the wanted one. Click Preview to check the healed object.
- Select: Decide which locator for you to take action.

During the test run, the locator replacement is temporary. In Self-healing Insights, you can discover broken locators that have been recovered at runtime.
Verify if the found object is the one you expect. You can select one or multiple suggested locators, then click:
- Approve: Make the changes permanent.
- Discard: Decline the proposal.
- Only available for Web UI testing.
- Image-based testing: During recording and spying, you have to decide which elements will be captured as images to create an image property. It's sometimes hard to know which elements can be broken during execution. This means you have to capture them all manually, or decide that certain elements are likely to be resilient and should be backed up with an image.